Subscribe to My Blog
Showing posts with label Windows. Show all posts
Windows XP and 7 Activates Downloads
 
Lot of people ask for Windows XP and 7 activation keys and methods. Here is a tutorial and download links on of activated Windows.

1) Firstly we need to get the torrent program. Here are a few (my favorite is Utorrent):
UTorrent
BitTorrent
Azureus

2) We need to find ourselves the torrent file, my personal favorite site and the most well known is ThePirateBay (TPB),TPB Link. The link takes you to the top 100 windows applications. In this list you will see windows programs as well as some editions of the windows OS. Just to help you guys out here's a link to 7 and XP:
Windows 7 Ultimate
Windows XP SP3

3) Now we need to download the torrent file. At each link there is a download button that says "Download this torrent". Click it and it will open up your torrent application, accept all windows and it will start downloading.

4) Now just burn it to a blank DVD or CD using a program and make sure its in the computer when you restart.
You see that almost everyone is fan of Windows and it has a raw amount of users but on other hand, Mac is also in front line Windows. Mac also has great features but is not popular than Windows. Following are the reasons why Windows is better than Mac.
  1. Much cheaper. This isn't new, but it's still the No. 1 distinguishing characteristic. The least-expensive new Mac is $999 (not counting the Mac mini, which doesn't really count, and barely sells). For that price, you can get a top-shelf Windows desktop computer or very nice Windows laptop, that will be faster, have more RAM and a larger hard drive than any comparably-priced Mac. Again, the money difference could have been justified before with the superiority of the Mac platform; not so with Windows 7 having closed the gap until it's basically gone.

  2. Many more programs available. You're limited with the number of programs available for Mac. This is especially true for high-end gaming -- try to find a hard-core gamer who uses a Mac. Good luck. If you're looking for financial software, for another example, you'll have dozens more options for Windows than Mac. If choice is important to you, Windows is the way to go.

  3. More transparent, and better, patching. Microsoft, because of well-earned skepticism of its security practices, has instituted the best and most public patching system in the industry. Every second Tuesday of the month is "Patch Tuesday", the day Microsoft releases Windows patches. The releases also come with detailed explanations and tons more information available than most vendors include. This includes Apple, which would like you to believe that its security is flawless. This is what's known in technical geek-speak as an untruth.

  4. More customizable. Let's say you want to add a beefier graphics card to your desktop computer. If you use Windows, there's a whole universe of choices, with a huge range of prices and features. You can upgrade a Mac the same way, but with far, far fewer options available. Apple tightly controls its "ecosystem" -- the vendors it allows to make software and hardware to run on its computers -- whereas Microsoft's ecosystem is much more wide open. That means you can tweak to your heart's content.

  5. You won't be part of the Mac fanboy universe. There's no gentle way to say it, so I'll just state it plainly: Mac users can be extremely snobby. There's an air of superiority that clings to many Macophiles, who love to look down on us sub-human Windows scum. This is a generalization, to be sure, and doesn't apply to all Mac users. But it applies to enough of them that I know I don't want to be associated with it.

  6. Microsoft isn't ignoring Windows development. This is hard to quantify, but by all appearances, Apple is giving Mac OS short shrift when it comes to development. For instance, most new announcements coming out of Apple these days revolve around the iPhone, iPod, iPod Touch and iPad. In other words, its mobile devices. There hasn't been much innovation over the last several years in OS X "Snow Leopard," its latest OS. Everything seems to be focused on iOS, the OS for the "i" line of mobile gear. Microsoft, on the other hand, is hard at work on the successor to Windows 7. It's also working on its own mobile stuff, but not to the exclusion of Windows. Windows 7 was a big advance over Windows Vista; no advances have been seen like that on the Mac OS side in ages.
Most of you might be aware of the fact that it is possible to use Windows 7 and Vista for 120 days without activation. This is actually possible using the slmgr -rearm command which will extend the grace period from 30 days to 120 days. However in this post I will show you a small trick using which it is possible to use Windows 7 without activation for approximately an year! Here is a way to do that.


1. Goto “Start Menu -> All Programs -> Accessories” . Right click on “Command Prompt” and select “Run as Administrator“. If you are not the administrator then you are prompted to enter the password, or else you can proceed to step-2.

2. Now type the following command and hit enter
slmgr -rearm

3. You will be prompted to restart the computer. Once restarted the trial period will be once again reset to 30 days. You can use the above command for up to 3 times by which you can extend the trial period to 120 days without activation.

4. Now comes the actual trick by which you can extend the trial period for another 240 days. Open Registry Editor (type regedit in “Run” and hit Enter) and navigate to the following

locationHKEY_LOCAL_MACHINE\SOFTWARE\Microsoft\Windows NT\CurrentVersion\SoftwareProtectionPlatform

5. In right-side pane, change value of SkipRearm to 1.

6. Now you will be able to use the slmgr -rearm command for another 8 times so that you can skip activation process for another 240 days. So you will get 120 + 240 = 360 days of free Windows 7 usage.

120 days using “slmgr -rearm” command before registry edit + 240 days using “slmgr -rearm” command after registry edit = 360 Days
Folder Lock is one of  folder protection or file encrypting software which helps you hide data safely without any unauthorized access. But today I’m going to teach you How to Bypass Folder Lock Manually.


Step 1.
Open REGEDIT using RUN command, and go to the following path
[HKEY_CURRENT_USER\Software\Microsoft\Windows\QualityControl] “_pack”=”this is encrypted password</em> ~~~”

Step 2.
Ignore sign ~~~~ , For example “espxttbqfwpm~~~~~”. After ignoring, it will like this “espxttbqfwpm
 
Step 3.
After that just type that in reverse order, for example if the code is “espxttbqfwpm” then just type in
reverse order. It would be like this “mpwfqbttxpse
 
Step 4.
This is a bit complicated step but it’s the most easiest step what you need to do here is that to move one character each to backward, here the example:
m becomes to l becomes the alphabet l is first letter before m,p become to o because o is the letter before p, and keep doing until all encrypted password you can read, in this tutorial the password –> espxttbqfwpm after decrypted becomes –> lovepassword
Windows 7 makes it easy changing the Windows log-on screen.


1. Go to start, and click on Run, type Regedit & press enter there.

2. Navigate to : HKEY_LOCAL_MACHINE\Software\Microsoft\Windows\CurrentVersion\Authentication\ LogonUI\Background

3. Double-click the OEMBackground DWORD key

4. Set value of the key to 1.


5. Select a background image for Logon Screen with size less than 256KB in size (Use of Image Resize software like VSO Resizer can help)

6. Copy that image into the following folder


C:\Windows\system32\oobe\info\backgrounds

7. Rename the image to backgroundDefault.jpg

8. Reboot, and now your logon Image would have changed.
KEmulator is a mobile java game emulator, KEmulator provides kinds of utilities making our developers more effectively, and it supports most of the popular mobile platforms. Whats more is that with this application you can even open java apps like opera mini, ucweb, etc. as such as you open it from your phone (including net facilities)
about KEmulator Lite version :
 
KEmulator Lite version is free and it has all the features necessary, like jsr75, proxy input, screen size adjustment, keypad mapping etc
 
It's written in java, and the UI is based on SWT win32. Now, the follow APIs are implemented: 
  • MIDP 2.0(JSR118)
  • NokiaUI 1.1
  • Samsung 1.0
  • Sprint pcs
  • M3G 1.1(JSR184)
  • OpenGL ES(JSR239)
  • WMA1.0(JSR120)
  • Bluetooth(JSR82)
  • PDA PIM(JSR75)
System Requirement :
  • Windows 2000 or later
  • JDK1.4.2 or later
     
Run KEmulator.exe
  • Menu: Midlet->Load Jar/Load with console.
  • Drag a *.jar into the shell, as the Drag & Drop of Windows
Useful Tips of KEmulator
Menu->Tool
  • Zoom in/out, default 200%
  • Ticks, design for GD(Game Designer) as a timer.
  • Capture/Record, save to "/capture" folder.
  • Speed up/Down, speed up the game rate.
  • Record keys/Enable Autoplay, refer to the Autoplay.
Menu->View->Options...
  • Custom settings:
  • Key Map:
  • System settings:
Auto-play Records
  • Select "Tool" -> "Record Keys".
  • Select "View" -> "Options" -> "Key Map" -> "Enable Key Cache". (it makes the key play-back accurately)
  • Launch a game, and play it. All your key presses are recorded, saved to "/records" folder.
  • Then, your can launch the record from "Midlet" -> "Load auto-play record". The emulator will play back all your have done.
download KEmulator lite version 0.9.8 from here
Windows 7 is quickly growing as a very popular operating system with its customizable features and appealing looks. Now, you can even transform your Windows 7 to give complete look and feel of a Mac operating system. Snow Transformation Pack enables you to swiftly modify your Windows 7 appearance so it takes on the Snow Leopard skin of OS X.

The transformation requires just a couple reboots. As soon as your PC restarts, you will begin to feel the magic of this amazing transformation. Right from Windows logon screen down to the theme, icons and controls, everything is replaced with a new, fabulous Mac view. It also includes the chic RK Launcher—any MAC user would tell you how incomplete his PC is without this pivotal tool.

snow-transformation-pack


At startup, you are greeted with the Welcome Center, which also offers several options, such as Configure user account, Repair system files and Remove Snow Transformation Pack. From the Configure user account link, you can control the desktop enhancements and other 3rd party apps that are to take effect. The settings are confirmed by clicking on the Apply Configuration button

snow-transformation-pack-options


An amazing transformation pack for Windows Vista and Windows 7 that totally changes how your computer looks.

Tested on Windows 7 x86 system.

Download Snow Transformation Pack
In a recent review of Microsoft Security Essentials it was discovered that an option to wake the computer to perform a scheduled scan did not exist. There is a way to force the computer to wake up and complete a scan but it involves editing the scheduled task within Windows 7. This tutorial will take you through the steps required to get this done.

The Microsoft Security Essentials Scheduler

Microsoft Security Essentials provides a nice interface for editing a scan schedule. You will find it by selecting 'Change my scan schedule' at the bottom of the Home tab.

Microsoft Security Essentials


From this interface you can set which day and time a scan should be performed. The default for Microsoft Security Essentials is 2 AM. This seems like a fine time to perform a scan since the computer is likely not being used. It's also likely that your power settings have placed the computer into a mode of sleep or hibernation. If the latter is true, the scheduled scan will not run.

In order to force your computer to wake and perform the scan the steps below should be followed.

Editing the Scheduled Task

Open the Task Scheduler. Within the Task Scheduler expand the Task Scheduler Library and then expand Microsoft. Below the Microsoft folder you should see another folder called Microsoft Antimalware. Select it.

Task Scheduler


In the right pane you should see the task for your scheduled scan: 'MP Scheduled Scan'. Next you need to access the task properties. To accomplish this, you may right click on the task and choose Properties or select the Properties link from the Actions menu.

Task Scheduler


 Within the task properties select the Conditions tab. Enable the option to 'Wake the computer to run this task' by selecting the checkbox.

Task Scheduler


The setting will now be applied. Unfortunately, any time you change the scheduled scan setting via the Microsoft Security Essentials interface, you will need to update the task again if you continue to desire the 'Wake to Run' functionality.

[via]
Mac systems are pretty trouble free, and OS X is a pretty solid system. However, as with all things, an ounce of prevention is better than a pound of cure, and there are some things that you can do with OS X to keep it running in tip-top shape.

#1 Back it up

The first and most crucial  thing to do is to keep a backup of your important files, or even the entire system. To clone the entire system (great for backups and quick restoration in the case of hardware failure), an external hard drive and SuperDuper! are the best solution as far as I am concerned. SuperDuper! makes a bootable clone of your hard drive; a great thing to do before performing large system updates, or something to schedule routinely. Other options include buying an Apple Time Machine and scheduling backups that way.


#2 Keep software up to date

Keeping software current is another important thing. Software updates not only provide new functionality and correct bugs, they often correct security flaws as well. Keeping your system up to date via the OS X Software Update is important, but so is keeping the third-party applications installed current. Many applications “phone home” to check for updates and will alert you if updates are available. Otherwise, you can point your RSS feed reader to MacUpdate’s web site to keep you alert of new software releases. You can also elect to pay MacUpdate’s yearly subscription fee and be alerted via email or use their desktop application (which is quite useful as well, as it will inform you of what installed applications are out of date).


#3 Perform a Permissions Repair

This can be done by launching Disk Utility, selecting the boot drive, and clicking Repair Disk Permissions. It is a good habit to repair permissions before and after large system upgrades (i.e., when upgrading from OS X 10.6.3 to 10.6.4). As well, in Disk Utility you can use the “Verify Disk” button to scan the integrity of the filesystem on the hard drive. If it identifies problems, you will need to boot from the install disc or a cloned drive (another reason SuperDuper! is useful) and use Disk Utility to repair them.


#4 Get the right tools

Tools exist to keep an eye on your system, and free ones are even better. To be informed of the impending decline of hard drives, use the free SMARTReporter menu bar tool. This tool checks the S.M.A.R.T. output of your hard drive(s) and reports if there are any failures or inconsistencies; however, keep in mind that this only works with internal SATA/eSATA/IDE drives, and not external drives.
Another great monitoring tool is iStat Menus. This is another menu bar app that displays useful information such as a CPU usage meter, memory usage, disk usage, disk activity, temperature sensors, and more. If it feels like the system is slowing down, clicking on the menu bar icons will show you what applications are taking the most CPU or consuming the most memory.


#5 Beware of memory leaks

With the stability of OS X, some people may leave their systems running constantly, or put them to sleep without restarting the system. If any running software has memory leaks, even small ones, leaving them open constantly will start to consume more and more system memory. Some applications that use a lot of memory, such as Safari and other browsers, may not fully release that used memory when tabs are closed, and it isn’t uncommon to see Safari using far more memory than a browser warrants.
I’ve seen Safari consume over 1GB of memory all on its own. Quitting and restarting these memory hogs will reduce memory consumption, at least for a time. Restarting the entire computer will reset OS X’s virtual memory system and clean things up; after restarting, the system should typically feel snappier.


#6 Watch your hard drive

Another common sense tips include keeping an eye on hard drive space. Generally speaking, you should always ensure you have about 10% of your drive available as free space; if you find yourself filling the drive quickly or often, consider replacing it with a larger drive, delete some unused applications or files, off-loading some archive data to an external drive, or simply emptying the trash every once in a while will help.


#7 Check Login Items

Finally, a lot of programs like to run little helpers in the background, or think that if you run them once, you want to run them all the time. Firing up System Preferences and looking in the Accounts pane, then selecting the Login Items tab for your account can be a real eye opener. These programs start when you log in, so if there are applications here that you do not want running, here is where you can remove them. Simply highlight the application you no longer want starting at login and click the “-” button to remove it.
These are all fairly straightforward tips, but continuing to keep them in mind will keep your system running at an optimal level of performance.
When every time windows 7 startup, most of windows 7 user will listen windows start sound appear if your computer sound system is activated. However, Windows start up sound is some thing which you may not want to hear every time, specially when you are booting your computer in room and it may disturb others, or in some cases there are people who are annoyed by the sound everytime windows boots up.

For all those who would like to remove the Windows 7 start up sound and make windows silent. Below is some simple step to silent Windows Startup sound.

How to silent Windows Start Up Sound:

1. Once windows 7 is loaded, press Window Key+R or locate Start Menu button-> Navigate to “Run” and type in “mmsys.cpl”. Then press Enter key or clock ok button.

2. A windows sound dialogue window will be open, click on Sound tab then locate the checkbox which says Play Windows start up sound at the bottom of the dialogue window and uncheck the checkbox as shown in the image below.

3. Click apply button, that’s it done. Windows 7 will now boot up silently every time you boot it.
WinZip (www.winzip.com) offers the ability to protect a zip archive with a password. The result is an encrypted zip archive that can only be opened if the correct password is entered. An encrypted zip archive provides confidentiality, it cannot be viewed by persons who don't have the password.

It is possible to encrypt files when they are added to the archive, but it's also possible to encrypt the whole archive at once. That's done by clicking 'Actions' in the menu and then choose 'Encrypt'.


winzip encrypt option

Encryption options in WinZip
Now a dialogue asks you to enter a password and choose a proper encryption algorithm.

winzip encrypt option


* The Zip 2.0 encryption format is known to be relatively weak, and cannot be expected to provide protection from individuals with access to specialized password recovery tools.
 
* AES is the Advanced Encryption Standard. This encryption method, also known as Rijndael, has been adopted by the U.S. Government's National Institute of Standards (NIST) as a Federal Information 
 
Processing Standard. WinZip supports AES encryption in two different strengths: 128 bit AES and 256 bit AES. These numbers refer to the size of the encryption keys that are used to encrypt the data. 256 bit AES is stronger than 128 bit AES, but both provide significantly greater security than the standard Zip 2.0 method. An advantage of 128 bit AES is that it is slightly faster than 256 bit AES, that is, it takes less time to encrypt or decrypt a file. Both 128- and 256-bits encryption are considered strong encryption by the security community.

Now click 'OK' and it's done.

Availability of zip AES decryption software is not standard
Not every zip program is able to decrypt an AES encrypted zip archive. The receiver needs to have a recent version of Winzip (or a compatible zip program) installed to open the document. However, WinZip is not standard software at the office and there are many free alternatives to create and open zip archives.
Encrypted zip files are blocked by e-mail scanners
 
Anti-virus scanners at e-mail gateways cannot scan the content of an encrypted file. Virus builders have abused this fact and distributed malware via password protected zip archives. This is the reason why many companies block e-mails containing encrypted zip files. As a result, it is unlikely that one can use encrypted zip files in order to exchange sensitive information between companies.
Think you know tech? If you don't have a handle on every single one of these 15 tech facts, habits, and efficiency tricks, you're not living up to your potential.

1. Don't double-click everything. Windows 101: Double-clicking is how you open items in Windows. It's not how you open links in your Web browser, click buttons in dialog boxes, or do pretty much anything else--and if you reflexively double-click, you might accidentally zip right past something important or submit a form twice. If you don't need this reminder yourself, chances are you know someone who does.

2. Use slashes and backslashes in the appropriate situations. Let's get it straight: / is a slash (or forward slash, if you must), and \ is a backslash. Backslashes are conventionally used for Windows file paths (C:\Program Files\Whatever), while slashes are used for Internet addresses (http://www.pcworld.com/howto.html).

3. Record the exact error message. When your PC crashes, it'll usually try to tell you why it is doing so--albeit with a string of numbers and letters that you won't understand. Write the message down in its entirety (or take a screenshot, if possible) so you can later plug it into Google or give it to your tech support agent. If your PC didn't provide an error message, go to Action Center (in the Control Panel) and see if it shows up under 'View archived messages' or 'View problems to report'.

4. Bring deleted files back from the dead. When you delete a file from your PC or memory card, you're not wiping it off the actual hard drive. Instead, you're simply removing the index information that tells your PC where the file is, at which point the PC is free to treat the part of your disk that contain that file as empty space that it can write something else to. If you've accidentally deleted something, undelete utilities such as Recuva can help you find those files again as long as you haven't already written over that file with something new.

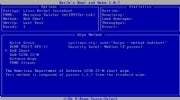
DBAN; click for full-size image.
 
Don't leave your personal data on your old PC's hard drive. Nuke it completely with Darik's Boot and Nuke.

5. Wipe your hard drive before getting rid of it. Because your PC doesn't immediately get rid of the files you delete, you can't just reformat your hard drive before recycling or selling your old computer--because someone might be able to use an undelete app to recover your sensitive data.Use Darik's Boot and Nuke.

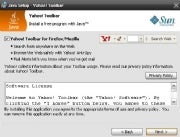
Uncheck the boxes; click for full-size image.
 
Want a totally worthless toolbar added to your browser? No? Then uncheck the box for that option before you install updates.
 
6. Uncheck the boxes before you install. Lots of helpful apps out there give you the option of installing search toolbars and other add-ons--and some of them are so pushy about being helpful that their installers are configured to install the uninvited extras unless you check a box saying you don't want them. Not only is each add-on another thing that your PC needs to load, but you have no idea what kind of data it could be sending out. They come bundled with the app because they make money for the app developer, not because they're particularly useful. So take a close look at what you're installing before you click Install--and in return, the installer won't change your search engine or install apps you don't need.

7. Beware of viruses living in Office docs. Experienced Microsoft Office users can take advantage of its built-in Visual Basic for Applications support to automate complex tasks with macros. However, malicious coders can use those same tools to design viruses that may interfere with your work and that of your colleagues. By default, Office is set to disable all macros and notify you when a doc you're reading contains them (to toggle this setting, in Word, select Word Options, Trust Center, Trust Center Settings, Macro Settings), so you should already be safe on this score.


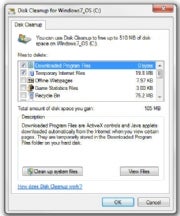
Don't spend a bunch of money on dubious disk-cleaning software. Windows' built-in Disk Cleanup utility has all the cleaning power most users need.
 
Disk Cleanup; click for full-size image.
 
8. Be skeptical of "cleaning" apps. Apps that make vague claims about improving your PC's performance and clearing out its clutter (Registry cleaners, I'm looking at you) will generally do more harm than good (if they do anything at all). To clean up your system, simply run Disk Cleanup (to reach it, select Start Menu, All programs, Accessories, System Tools); it comes with every Windows installation and it won't mess up your PC.

9. Uninstall your old apps. If you regularly download and install new apps from the Internet, you should get in the habit of pruning your collection every now and then. To do so, open the Programs and Features control panel, scroll through the list, and click Uninstall to ditch items you no longer want. You may need to take a trip into your C:/Program Files/ folder to hunt down a few additional unused apps. The less stuff you have on your PC, the less things are to go wrong.

10. Don't let a spilled drink ruin your laptop. If you keep your cool when a spill occurs, you may be able to prevent your data from disappearing and your motherboard from frying. Instead of panicking, quickly but methodically unplug the power cord and yank out the battery--don't wait for Windows to power off. Next, detach anything connected to the PC (network cables, USB devices) and pull out any readily removable components such as an optical drive. Tilt the laptop to try to drain the liquid in the direction that it spilled onto your PC, but be careful--you don't want to tilt the laptop in a direction that would allow the liquid to seep even deeper in. If you see liquid on the surface of the laptop, dab it off with a towel. At this point, unless you're comfortable disassembling your PC and cleaning it with electronics cleaner, you'll probably want to take it to a tech.

11. Turn down UAC. Both Windows 7 and Windows Vista include a security function called User Account Control, which dims the screen and flashes a dialog box whenever you install an app or change your system settings. Though this arrangement can be useful for catching sneaky apps that are trying to install or change things without your knowledge, it can also be annoying. If you use Vista, grab TweakUAC to make it less annoying without turning it off. If you use Windows 7, the default settings aren't too bad, but I recommend that you go into the User Accounts control panel, click User Account Control settings, and change the setting to the third notch down, so UAC will still warn you but it won't dim the screen.

12. Don't work in your admin account. Many PC users are accustomed to doing their everyday work while logged in to their PC's administrator account--especially in Windows XP. Doing so can save you the hassle of having to log in and out when you want to install apps or make changes, but it also leaves you much more vulnerable to viruses and malware--so don't do it.

Icon View; click for full-size image.
 
The Control Panel is far easier to navigate when you can see all the icons at a glance.  

13. Keep your Control Panel in Icon View. The Control Panel's Categories view can be useful if you're intimidated by the many different options available, but it can also make finding what you're looking for more difficult (especially if you're following detailed instructions that refer to the control panels by name). Click Classic view on the left (in Vista) or choose Large Icons from the View by dropdown menu in the upper right (in Windows 7), and you'll have ready access to all of the control panels.

Notification Area Icons; click for full-size image.
 
Limit the clutter in your system tray by paring down the list of icons that occupy it.
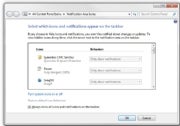
14. Clear your system tray. Apps often park themselves in the system tray (the row of icons on the right side of your taskbar) and stay open without your realizing it. Take the time to clear it out occasionally. Open the Notification Area Icons control panel, and check the box on the bottom that says Always show all icons and notifications on the taskbar to get a sense of how cluttered your system tray is; then right-click each one you don't need and choose Close. Your RAM will thank you.

15. Manage your power settings. If you're using a laptop, you'll want to know how to change your power settings so your PC doesn't waste battery when you need to conserve it, doesn't slow down when you need to go fast, and doesn't go to sleep at an inopportune moment. Open the Power Options control panel, and choose from among several presets containing different configurations for when you're plugged in and when you're mobile--or feel free to create your own. To access the advanced settings, click Change plan settings, Change advanced settings; there you'll find detailed options related to your battery, Wi-Fi radio, graphics card, and more.

Are you looking for a solution to login to multiple Skype accounts simultaneously?

CalimSkypeLauncher allows users to sign in to multiple Skype accounts at the same time. With this application, you can open multiple Skype accounts for your professional and personal contacts and keep all of them running at the same time.


It is a portable application that can be launched instantly after download. The first step is to enter the username/password of all your Skype accounts. It supports multiple login of upto 3 Skype accounts. When done, providing this information, open CalimSkypeLauncher file to sign into multiple Skype accounts. You will be prompted when it successfully signs in to all your accounts.

calimskypelauncher-


calimskypelauncher


A handy application for signing into multiple Skype accounts. You must have Skype 4.0 or later for this app to work.

Download CalimSkypeLauncher

mousejiggle
It used to be that when I watched a movie with VLC, halfway through the movie the screen would suddenly black out. Too late, I would realize that the screensaver kicked in because I hadn't touched the mouse for a while. It was so irritating that I simply disabled my screen saver.

I think VLC specifically addressed this issue, but I'm sure it still happens with other video players. Mouse Jiggler is a tiny, handy utility whose sole purpose in life is to jiggle the mouse cursor for you, so that the screensaver doesn't kick in.

It has a neat feature called "Zen jiggle" (I love the name) which jiggles the mouse "invisibily" – meaning, your computer thinks the mouse is moving, while the cursor doesn't actually move anywhere.

The GUI is sparse, and I like that. Just two check boxes. You can't even minimize it or hide it, and I think that's great: this way you can't forget it on, and then wonder why your mouse is randomly jiggling while you're working. Very nice!
USB Security Utilities 1.0 is a utility which controls and protects USB drives such as pendrive, removable hard disk etc. It has a strong scanning engine which helps to analyze the memory or a folder. It is small in size and portable and can be installed in any portable device. It will also detects dangerous files and draw backs as well as handling various functions in one single window.

USB Security Utilities

 USB Security Utilities 1.0 Features

  • Small in size and portable
  • Can be installed in various portable device
  • Supports Strong Scanning Engine
  • Detects dangerous files
  • Can view device information
  • Multilanguage interface
  • Simple to use
  • Strong detection ability
  • Prevents infection of device
Download USB Security Utilities 1.0 Here.
Microsoft has sold 150 million copies of Windows 7 in nine months--that is, seven copies per second. It's the fastest-selling operating system in history. Vista, by contrast, was such a flop that users couldn't wait to get rid of it.

Many consumers just got stuck with Vista because new PCs, for a while, were preloaded with it, and there were no other options. Some vendors still offered new, coveted systems with XP, for a lot more money. Yet, in the beginning, retailers even told consumers there was no way to uninstall Vista and reinstall XP.

What does the new operating system mean for the business community, especially all the little guys and mid-sized companies that can’t afford to make another hefty investment in a rotten lemon?

Thankfully, Windows 7 is not the lemon Vista was, and its big, positive features are well-known by now. For example, multitasking makes it easier to navigate, and Windows 7 is more stable and secure. The new OS requires less memory and disk space. It has easier, more proficient file organization, less clutter and garbage, and more efficient networking setup and management. Windows 7 also touts a fancy new taskbar and system tray, better backup options, and some great entertainment features.

These five additional selling points of Windows 7 may surprise you.

1. XP Mode

One of the best features for companies who still want to use many legacy XP applications is XP Mode, which runs in the Windows 7 Professional, Ultimate, and Enterprise versions. This was a lifesaver for me, because I have dozens of old graphics programs that I use several times a week.

When I bought a new PC that came pre-loaded, unfortunately, with Vista, none of these XP-only programs would install. I could not afford to replace all of my software, and some of the other programs created years ago by smaller, independent manufacturers were no longer available. I was devastated, and searched the Internet for another XP machine.

Admittedly, some programs, such as Office 2000, run a bit slower in XP mode, but all the graphics programs work fine. However, even if they did run slowly, I’d still be grateful for the ability to continue using them.

Originally there was some concern about the functionality of XP mode on older systems. But as of March, XP Mode no longer requires hardware virtualization technology, according to Microsoft. Therefore, most of the PCs that lacked the appropriate hardware to support XP Mode will now work. So, if this was the reason you were hesitating to upgrade, it’s no longer an issue.

2. Folder Options

Another great feature in Windows 7 is Folder Options, which fixes a huge, time-consuming blunder in Vista. I have heard nothing but frustrated complaints about how much time people waste changing Vista’s default folder options to meet their needs. In fact, when I last checked, there were several hundred thousand Google search results about this Vista nightmare.

Someone at Microsoft came up with the lame idea that users needed to be told which folder options are displayed based on the files in that folder. For example, if the folder contains JPEGs, then Vista defaults to Icon view and displays the Name, Date Taken, Tags, Size, and Rating columns. Hundreds of bloggers provide the Microsoft knowledgebase workaround, but it doesn’t work permanently.

Vista also has a maximum number of folders for which you can customize the settings. Once you exceed that number, the old defaults return.

Windows 7 fixed this problem. First, it offers several different custom views that you can apply through the Properties dialog, which, like Vista, can be customized further. But there is no visible maximum. We tested a system that had over 3000 folders, and Windows 7 retained the settings we defined. This might seem like a minor feature to some, but for the legions of companies and users who have begged for a solution, it’s a deal breaker.

3. Location Aware Printing

Location Aware printing--available in Professional, Enterprise, and Ultimate editions only--is a big plus for employees who work remotely or who carry a laptop in the field. This feature allows users to configure multiple default printers, based on their location. And it is system controlled; that is, once you define the setup criteria, Windows 7 automatically resets the default printer to your current location. All you have to do is select Print, and it automatically sends the job to your network printer at work, your personal printer at home, or another shared printer. And, you can define as many print locations as needed, based on how many locations you frequently visit.

4. Remote desktop connectivity

Remote desktop connectivity is another big plus in Windows 7. If your employees are working at home or out of town and forget a file at work, they can connect to their office PC in five easy steps. Not a big deal? Well, yes it is. Wasn’t this function available in Vista? Well, yes, it was, but it rarely worked and, when it did work, it was far more trouble than it was worth.

The last office I worked in had 63 employees and one part-time IT technician who doubled as a network system administrator. After a month of trying everything; that is, calling everyone we knew with PC experience, searching Internet forums, wading through Microsoft knowledgebases, and reading instruction manuals, we finally just gave up on Vista’s so-called remote desktop and purchased Symantec pcAnywhere.

The Windows 7 remote desktop actually works--well, in fact--and the setup is menu-driven and intuitive. For details, simply follow the step-by-step instructions in the Windows 7 Help menus, or select Remote Settings from the Start button, right-click Computer, then choose Properties, and read the screen. Once connected, you can access everything on your office PC, including files, network resources, and applications.

You cannot connect to your office PC if it’s in Sleep or Hibernating mode, so be sure to disable this feature by setting it to Never when you visit Windows 7's Power Options, then select Change Plan Settings.

Also, you cannot connect to a computer remotely with Windows 7 Starter, Home Basic, or Home Premium. And if, for some reason, you work in a network environment but can't change your remote settings, then ask your system administrator about releasing control through the Group Policy settings.

5. MultiTouch support

MultiTouch support is another deal maker for some companies that purchased laptops and netbooks specifically for the touch screen options. Since mobile phones, iPads, and many netbooks have virtual keyboards, employees have quickly adapted to the touch screen feature and found that it increases efficiency, for example, when conducting webinars, classroom training, and sales demos at product trade shows.

It’s much easier than using the keyboard and mouse just to tap the screen, slide a scroll bar, or roll the cursor across the desktop with your fingers, especially when showing a quick presentation to your clients at lunch. Desktop users may not appreciate this feature much, but your employees with mini and mobile systems will love it. Besides, how many employees still have desktops these days?

So, what will Windows 7 do for you and your company? In five words: simplify tasks and increase efficiency. It’s definitely worth a second look.

What is a Virtual Hard Disk(VHD)

Virtual Hard Disk (or VHD) is a virtual hard disk image that stores data in a single file. This type of file is created and used on by Microsoft virtualisation solutions such as Windows Virtual PC. This format was adopted by other virtualization solutions like VirtualBox, the product of Sun Microsystems, or VMware ESX Serve.


How to Mount a VHD Image using Disk Management

First of all, open the Disk Management utility.

Disk Management


In the left-side panel, right click on Disk Management and choose the 'Attach VHD' option.

Disk Management


You can find the 'Attach VHD' option also in the Action menu (see capture below).

Disk Management


Click on Browse.

Disk Management

You now have to select the VHD file. When found, select it and press the Open button.

Disk Management


You are now back to the 'Attach Virtual Hard Disk' window. My advice here is to let the 'Read-only' box unchecked, so you can modify the files from the image. If this box is checked you will only be able to copy the files. Click on OK to begin the mounting process.

Disk Management


You will see that the VHD file has been mounted as separate disk drive and it has its own drive letter, in this case 'K:'.

Disk Management


Open Windows Explorer and click on the new partition to open it.

Disk Management


Now you can easily manipulate the desired files from the attached system image.

How to Unmount a VHD Image from Disk Management

After you are done working with the mounted virtual image, it's time to see how to unmount it. Open Disc Management, right click on the attached VHD (in this case 'K:') and choose the 'Detach VHD' option.

Disk Management


Click on the OK button to finish.

NOTE: In the 'Detach Virtual Hard Disk' window you can find the 'Delete the virtual hard disk file after removing the disk' option. This allows you to erase the selected image. I strongly advice to leave this box unchecked so you let the VHD image intact. Check it only if you really want to delete this image.

Disk Management


You will now see that the partition has been removed from the Disk Management window.

Disk Management

Useful Usage Scenarios

There are times when you need a single file or folder from a VHD file or System Image created by Windows Backup. Using the Disk Management utility you can easily mount the VHD file and copy the files and folders you need.

Also, this allows you to add folders and files to any image. Depending on the usage scenario - this feature can be useful.

Conclusion

As you could see from this tutorial, it's very easy to use Disk Management to mount VHD files and work with them. If you have any other tips to share related to this tool, don't hesitate to leave a comment.
Quite often people get confused as to whether it would suffice, if they buy a windows 7 Upgrade product like Windows 7 Home Premium Upgrade, Windows 7 Ultimate Upgrade or a windows 7 Professional Upgrade. This is because Microsoft offers a upgrade version as well as a full version of the various windows 7 products!

A windows 7 Upgrade version is usually much lower in price than the full version. The upgrade version is however meant for those PC users, who already own a licensed version of windows XP or windows vista on their PC.If you don’t have a licensed windows software running on your PC, then you are not entitled to buy and use a windows 7 upgrade product, though you could technically use it to install on a PC, that doesn’t have any windows product installed!

Yes, it is technically possible to use an upgrade disc to clean install windows 7 on a PC that doesn’t have any previous version of windows 7 installed on it! Infact, if you are having windows xp on your PC, you will have to do a windows 7 clean or custom installation. further, if you own a 32-bit windows vista and you intend upgrading to a corresponding 64-bit windows 7 on your PC, then, you need to do a clean installation. Other windows users can do what is termed as an in-place upgrade installation of windows 7.

So, microsoft does make it technically possible to install windows 7 on a blank hard drive in a PC, but you may not be legally permitted to do so.If you happen to use an upgrade disc to clean install windows 7 on a PC, without being legally eligible i.e. if you don’t have a licensed copy of windows xp or vista running on that PC, then microsoft may not support you if you face any technical issues and you may even find yourselves in legal trouble.

This has been beautifully illustrated by msmallbiz on the MSDN blog here.

windows 7 upgrade, windows 7 home premium upgrade, windows 7 ultimate upgrade, windows 7 professional upgrade

If you own a PC with a pre-installed windows xp or vista (windows OEM license), then you can use the upgrade disc only on such computer and not on any other computer! You will probably understand this better if you read through what a windows 7 OEM license entitles you to.
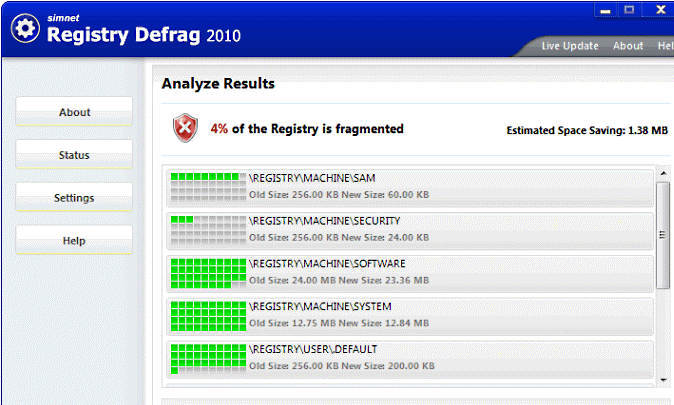
Simnet RegDefrag is yet another tool to defragment your registry. It quickly scans your registry and provides you with an overview that shows which parts of the registry are defragmented and to what extend. The program will create a System Restore point before it starts the defrag process, so you can undo the changes if you run into problems. By using Simnet Registry Defrag periodically, you improve your system’s performance, prevent registry corruption, compact and optimize windows registry.

Simnet Registry Defrag, Defram Optimize PC, Registry, Freeware, Download


Features:

* Automatic system restore points for safety.
* Automatically product update.
* Smart and easy-to-use interface.
* Minimal installation, low memory and cpu usage.

Download Simnet Registry Defrag
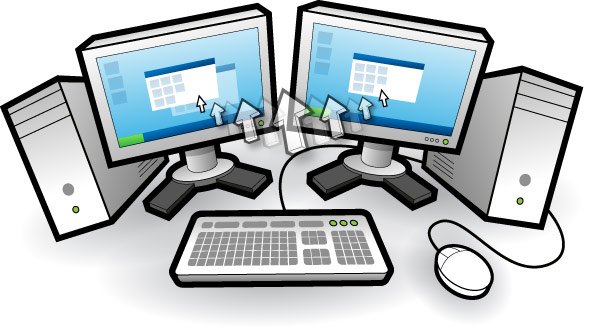
Want to Control Multiple PC with Same Mouse and Keypad than you have to try Input Director,  it a free app which allows you to control multiple Windows systems using the keyboard/mouse attached to one computer. With Input Director, you can share a single keyboard/mouse across a set of systems. You switch which system receives the input either by hotkey or by moving the cursor so that it transitions from one screen to the other (in a very similar fashion to a multi-monitor setup).

Using Input Director, you will be able to position the monitors of your systems side-by-side and then control all of them via one keyboard/mouse. Input Director also supports a “shared” clipboard, in which you can copy data onto the clipboard on one system, transition across to another and paste.


Features of “Input Director”:

Easy to Use:

· Easy to follow installation and usage guides – setup only takes a few minutes
Tell Input Director how your monitors are positioned simply by dragging them to the correct spot on the monitor grid:
· Multi-monitor support
· Shared Clipboard – copy and paste between computers (including files!)
Manage all your computers at once:
· Simultaneously lock all computers
· Synchronise the screensavers across your computers
· Synchronise shutdown of your system (or individually configure whether a computer goes to standby, hibernate or shuts down)

Security:

· Encrypt network data between Input Director controlled computers using AES with a 128, 192 or 256bit key
· Lock down the Input Director configuration so that only Administrators may make changes
· Systems can limit which master systems can control them by host name or network subnet
Transition Features:
Ripples surround the cursor for a few seconds after transitioning to help the eye follow the cursor from one computer to another:
Transitioning using the mouse can be setup to occur:
· Immediately when the cursor hits the edge of the screen
· If the screen edge is double tapped by the cursor
· If the cursor momentarily pauses at the edge of the screen
· Can be configured to limit transitions near the corners of computer monitors to avoid accidental slippage between systems
· Can also set a key (or keys) that must be held down to permit transitions between systems
· Hotkeys can be setup to switch control to a specific computer or move to the next computer to the left or right

Download Input Director Here

Popular Posts